My Trusty Pie Dough
11.18.22
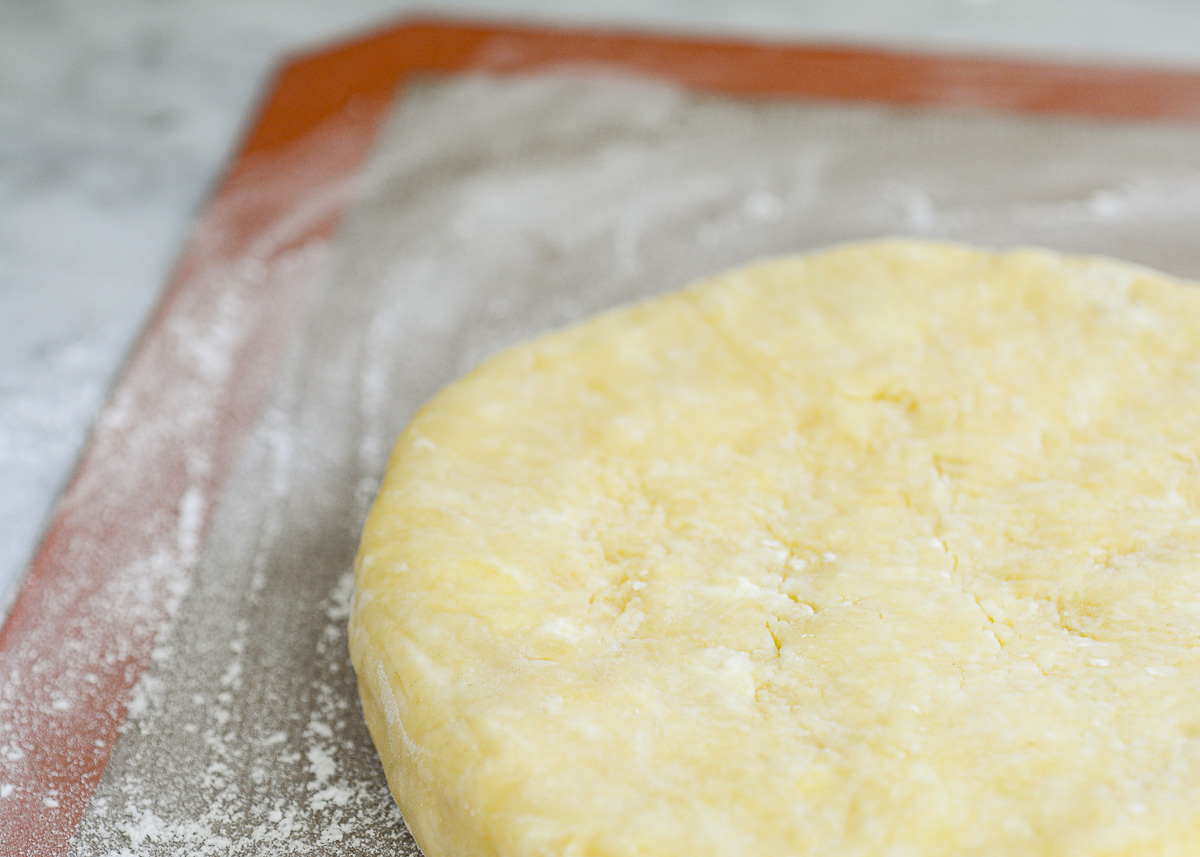
This has been my go-to pie dough recipe for a long time and it never let’s me down, that’s why I call it My Trusty Pie Dough. I hope you find it as trusty as I do. It’s easy to work with, probably because it has an additional ingredient that most recipes don’t have: a small quantity of egg. Also, ease of handling requires you to keep it chilled while working with it. Any warm pie dough will tear easily, including mine. If you work with cold dough and never stretch it, you’ll be successful.
If you need to make multiple pies, I recommend that you weigh out the number of batches that you need and mix one after the other, which will go quickly. All the ingredients should be kept separate in small bowls or deli containers. The only things I combine are the dry ingredients. For ice water, I keep a Pyrex glass measuring cup of water with ice cubes on the counter, and weigh it as needed. I’ve done as many as six batches like this.
Pie Dough Cookies:
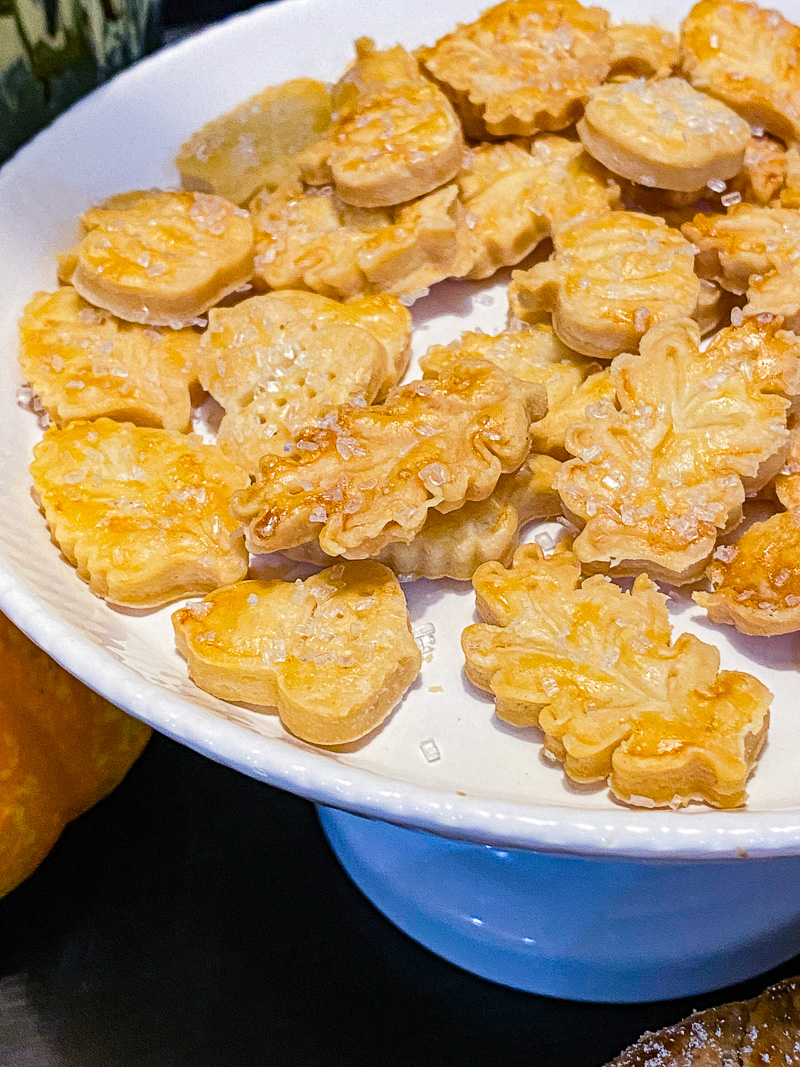
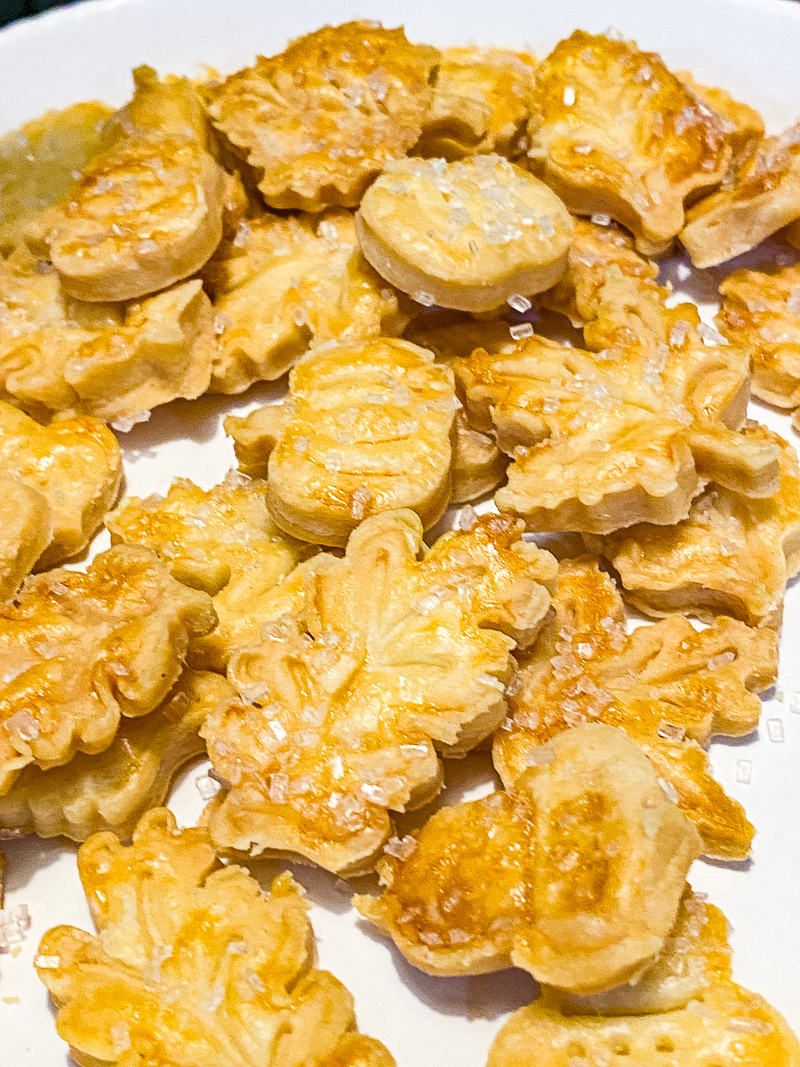
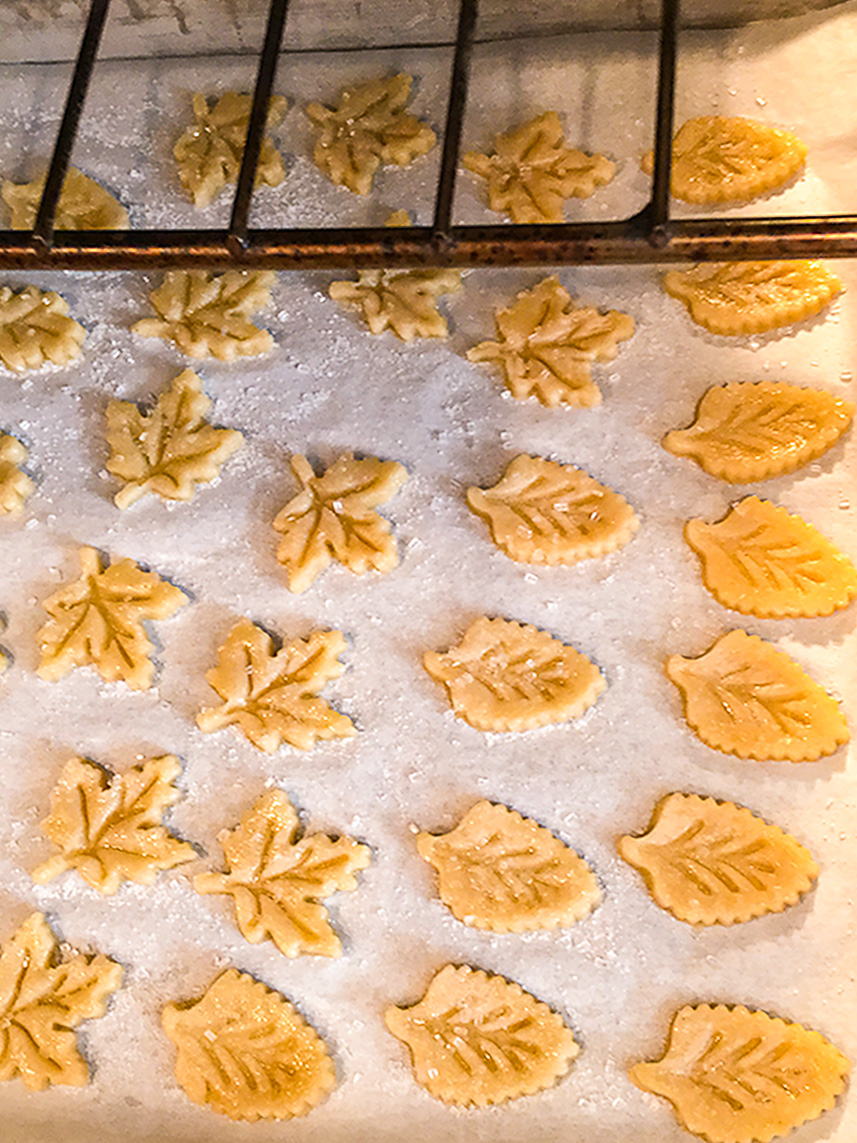
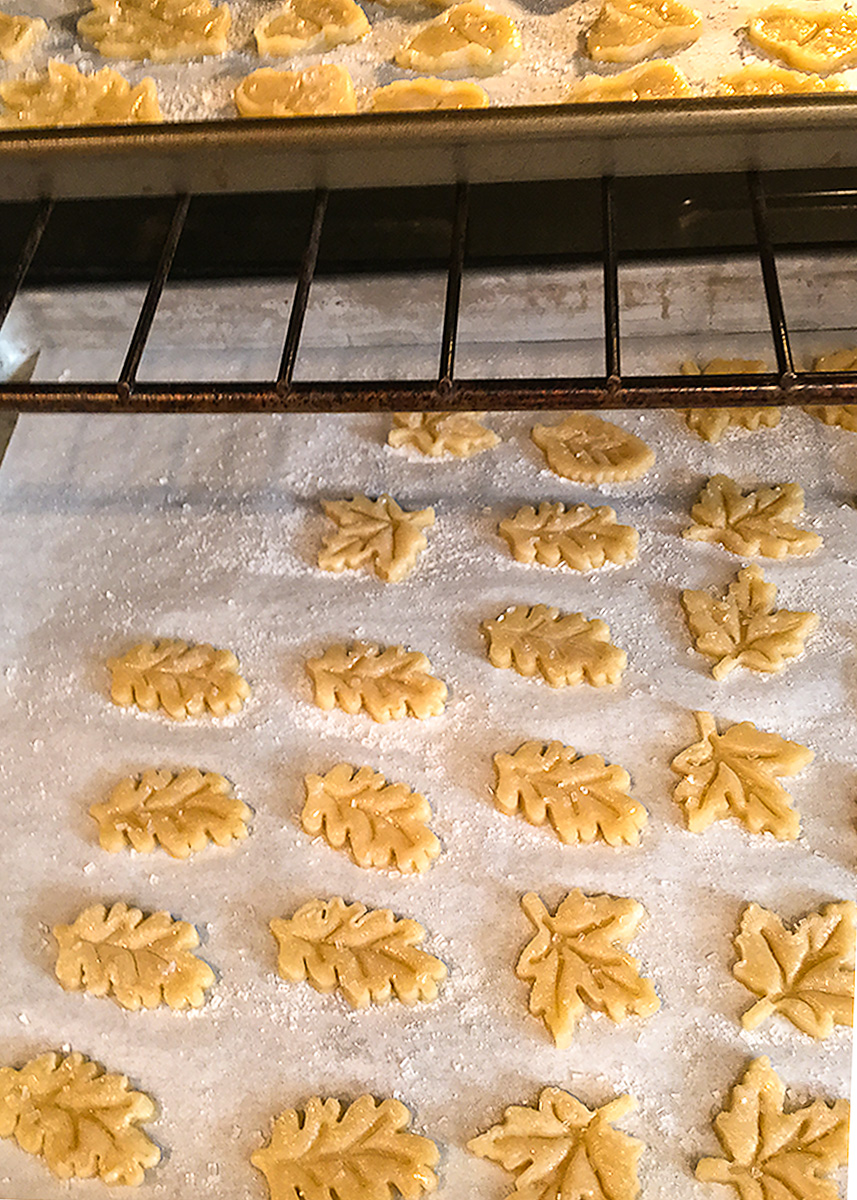
This dough makes terrific little cookies as well as pie shells. Pie dough cookies always remind me of my mother or my grandma. When making pies, they would cut up the pie dough scraps in little pieces, sprinkle them with cinnamon sugar, and bake for us kids to nibble on. We loved them, and you can do that too. These fancier ones are made with inexpensive cutters similar to these. Be sure to buy the kind with a plunger that imprints the leaf veins or other marks. See recipe for how to make these.

My Trusty Pie Dough
Ingredients
- FOOD PROCESSOR METHOD:
- YIELD: 1 - 9" PIE SHELL 380g 13.5 ounces
- Plus a little extra dough for for pie crust cookies
- 300 grams bleached AP flour 2 1/3 cups (Gold Medal)
- 10 grams granulated sugar 1 Tablespoon
- 3/4 teaspoon fine sea salt
- 100 grams unsalted butter cut in 1/2-inch cubes and freeze (7 Tablespoons)
- 75 grams vegetable shortening freeze first, then cut in 1/2-inch chunks (6 Tablespoons) (Crisco)
- 25 grams whole eggs cold (whisk 1 lare egg, then weigh)
- 10 grams fresh lemon juice cold (2 teaspoons)
- 60 grams ice water 1/4 cup
- 580 grams = Total 20 ounces 1 lb. 4 oz.
Instructions
- Weigh flour, sugar, and salt into one container using the tare button on your scale. Weigh the other ingredients into separate deli containers or small bowls. This is called a mise en place (everything in its place before you start mixing, including equipment and supplies. See recipe headnote above..
- Start mixing. Transfer dry ingredients to food processor bowl. Scatter frozen butter cubes over the flour mixture and pulse 2-3 times. Add chunks of frozen shortening. Pulse until mixture is crumbly and an uneven mixture of small lumps of flour-covered fat.
- Whisk cold egg, lemon juice, and ice water together and pour over flour mixture. Don't combine liquids until ready to add to food processor.
- Pulse just until the dough comes together in a soft mass of dough that sticks together.
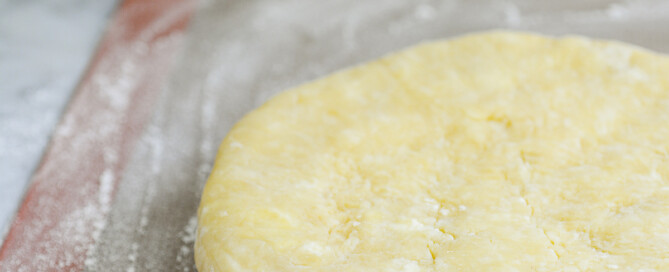
- Transfer dough to a lightly-floured work surface and press together.
- Weigh the quantity needed for piecrust 380g (13.5 ounces). The extra dough can be used for piecrust cookies if you like. Press each piece of dough into a flat disk and wrap tightly in plastic wrap. Chill dough at least two hours or overnight before rolling out.
- Set up a floured Silpat mat on counter for rolling out dough. Have extra flour on hand in a small container. Roll out both chilled disks of dough a little thicker than 1/8-inch (about 4 mm). First, roll out the larger piece of dough for the pie. Lay a large piece of plastic wrap directly on the dough and roll out to 13 inches in diameter for a 9-inch glass pie plate. Roll from center out, turning the Silpat or the dough, whichever is easier for you, a quarter turn each time. Maintain a round. Peek under dough occasionally to see if you need more flour.
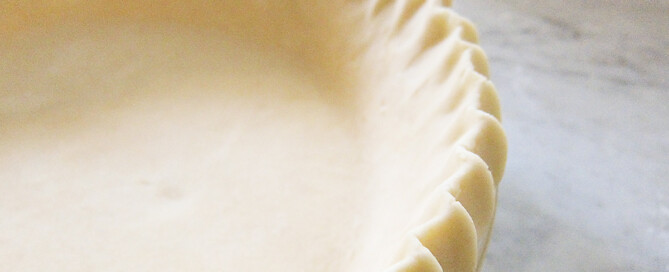
- Spray pie plate with non-stick spray with flour such as Baker's Joy. Leave the wrap on the dough and roll up on your rolling pin. Unroll on top of the pie plate, centered, with plastic wrap up. Gently ease the dough down into the corners of the plate. Push down; don't stretch up. The wrap on top makes it easier to handle the dough without stretching it. Lift up the wrap just enough to trim off the excess dough, leaving a 1-inch border beyond the edge of the pie plate to turn under later for the crust. Chill the pie shell until it feels firm, at least an hour.
- Allow the dough to warm up a little, then gently fold under the overhanging edge. Refrigerate again until it feels firm before crimping.
- Now crimp the edge to form the crust. Make sure that the crimp is right on top of the rim with no overhanging dough. Press hard when crimping so that it holds its shape in the oven. Freeze crimped shell.
- Plan to blind bake while frozen or very cold. Blind bake means to bake the crust without a filling. If making a pie where the pie shell is not blind baked, leave in freezer or refrigerator until needed.
- Repeat the same steps for rolling out the extra disk of dough if making cookies. Unroll onto a cookie sheet or half sheet pan with plastic wrap on top. Refrigerate or freeze until dough feels hard. The dough should be very cold or partially frozen when cutting out cookies. If you have no cookie cutters, just cut the dough into any size squares that you like.
- TO BLIND BAKE PIE SHELLS: Pre-heat oven to 425° F (218° C).
- Spray a piece of foil large enough to cover pie, plus overhang, with non-stick spay. Place foil, sprayed side down, into frozen (preferable) or very cold shells, pressing gently into corners and over the crimping. Trim off excess foil, leaving enough to cover the crimped crust. Fill with dried beans or pie weights and set pie shell on a sheet pan.
- Place in oven and immediately turn oven down to 375° F (190° C).
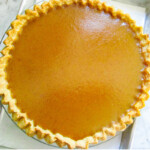
- Bake 35-40 minutes, until the crimped edge is the desired color for your pie. Regarding color, if your pie will be baked again with filling, such as my Creamy Pumpkin Pie, keep the crust light. For pies that are not baked again with filling, such as lemon meringue, you should bake until darker, the desired color for the finished pie. Rotate pan as needed for even browning.
- Carefully remove foil and beans, turn oven down to 325°F (162° C), and bake another 10 minutes, or until the bottom of the crust looks baked through and no longer raw. If necessary, bake a few more minutes. The pie crust should be a nice even color.
- Cool shells, or use hot, depending on the pie filling you are using.
- TO BAKE PIE DOUGH COOKIES: If making cut-out cookies, brush frozen cookies, still on their sheet pan, lightly with a little beaten egg white. Sprinkle with granulated or sparkling sugar. Bake at 325°F (162° C) 8-10 minutes, or until they reach your desired color. Watch closely; they bake fast. Let cool on baking pan. Store in air-tight plastic container until needed.
Notes
Thanks for stopping by.
Enjoy!
Shirl